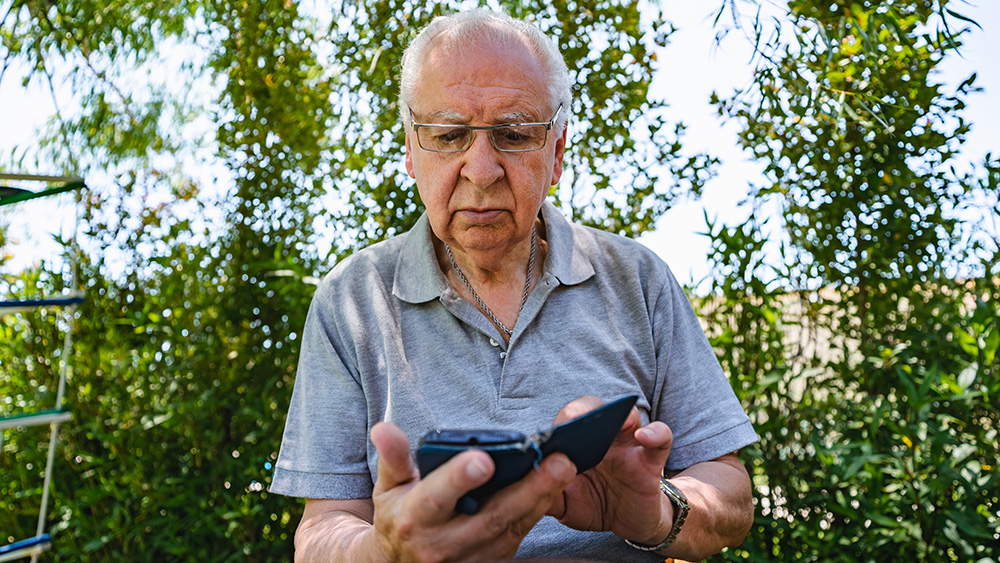
When you are in an emergency situation and need to get in touch with someone for help, the first call is usually to 911. But after that, it is very helpful to have an emergency contact – especially if you are unconscious or unable to communicate with anyone.
Who should I choose as my emergency contact?
Selecting a person as an emergency contact is something you should consider carefully. Some questions you should think about when choosing your emergency contact might be:
- Will this person be available if they are needed?
- Does this person know my medical history?
- Do I want this person to make medical decisions for me?
- Does this person have power of attorney or other legal rights for me already?
- Can this person contact other family members and loved ones to notify them if necessary?
Before you decide, be sure to tell the person you are choosing them as your emergency contact and ensure they agree with your decision.
Information to include in emergency contact
In addition to adding a person who can answer questions about your medical history and help with health decisions, you should include information that could be helpful to first responders or healthcare providers who are treating you. This includes:
- Allergies
- Blood type
- Existing medical conditions
- Medications
- Organ donor status
Setting up an emergency contact in your phone
The steps for setting the Emergency Contact in your phone are fairly straightforward in both iPhones and Android phones. Step-by-step instructions are outlined below for both devices.
Set your emergency contact for an iPhone
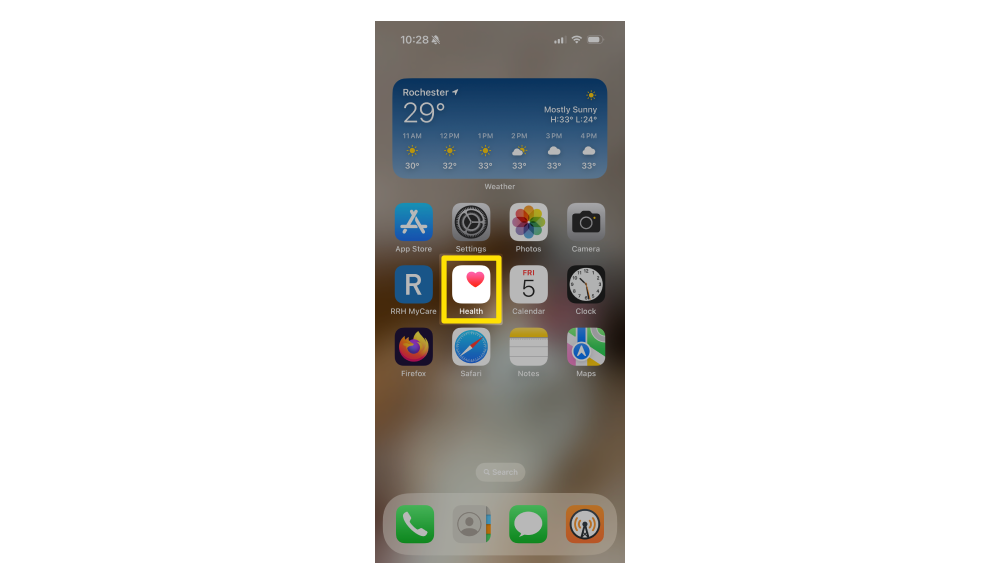
1. Open the Health app:
Start by opening the Health app on your iPhone. You'll find it pre-installed on your device.
2. Access and Edit your Profile:
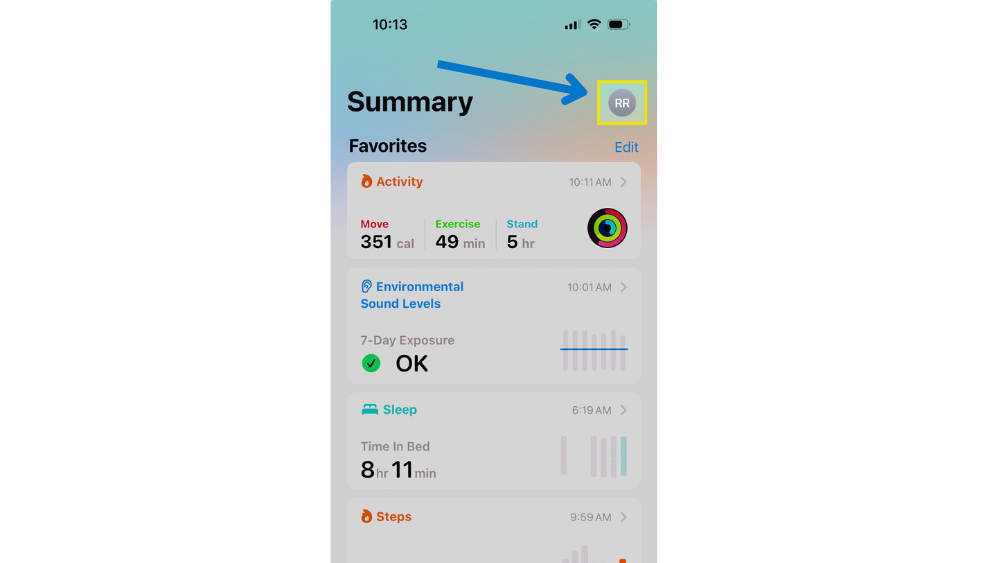
Tap on your profile picture located in the upper-right corner of the screen in your Health app.
3. Navigate to your Medical ID
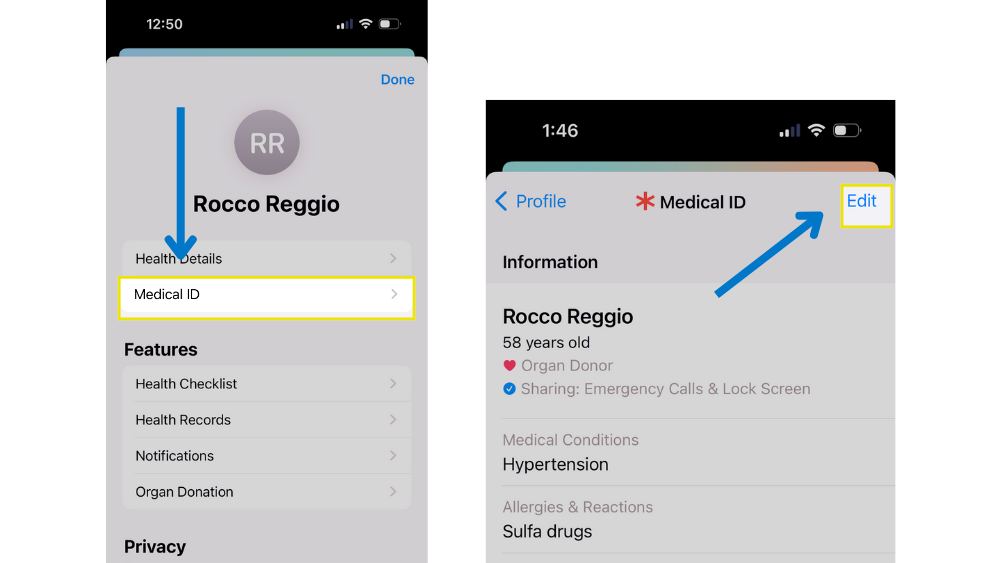
Under your profile picture, you will find the option for Medical ID. Tap on it and then select Edit, which is located in the upper-right corner.
4. Find Emergency Contacts section:
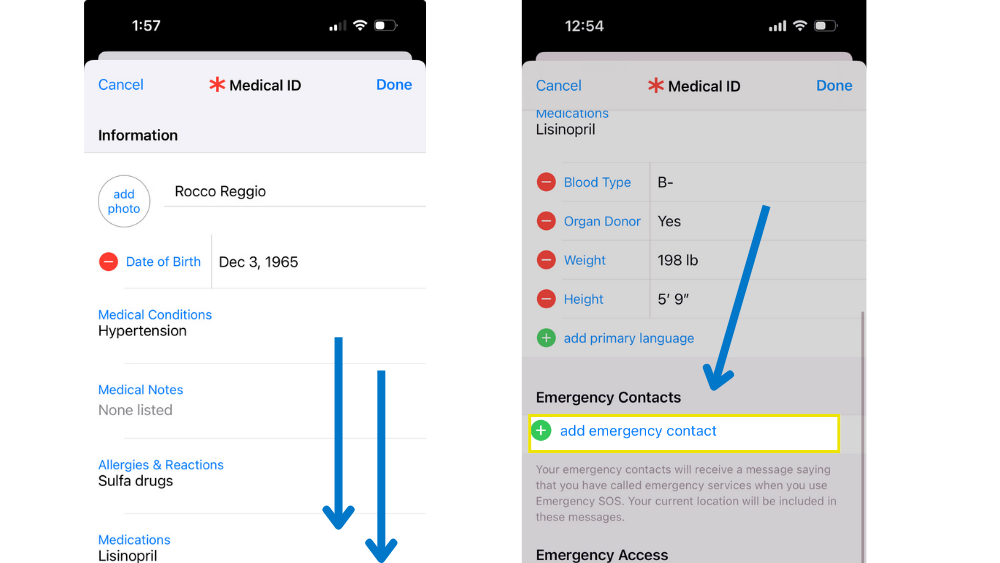
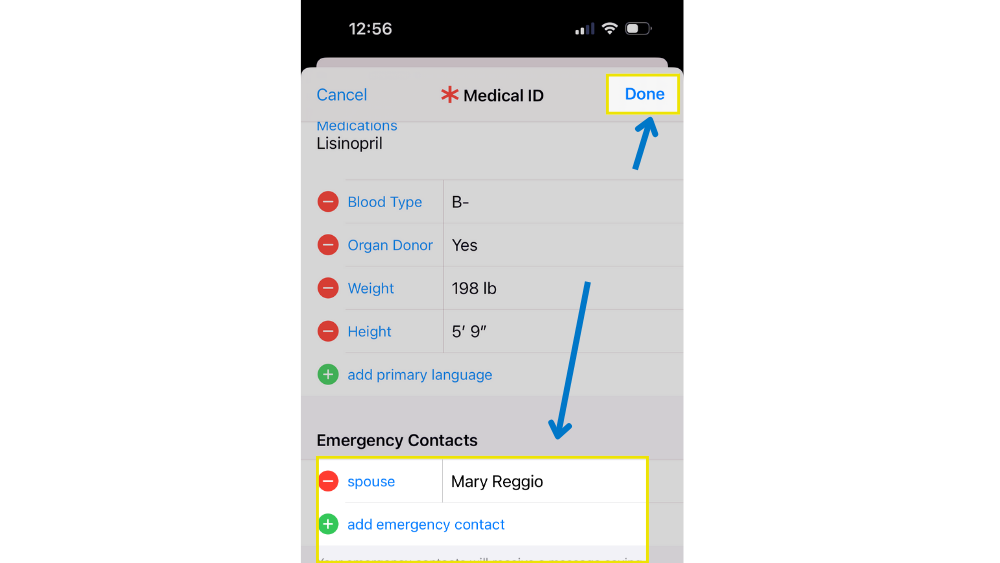
Scroll to the 'Emergency Contacts' section in the Medical ID edit mode. Tap the green Plus icon next to 'Add Emergency Contact'.
5. Select Emergency Contact from Contacts List
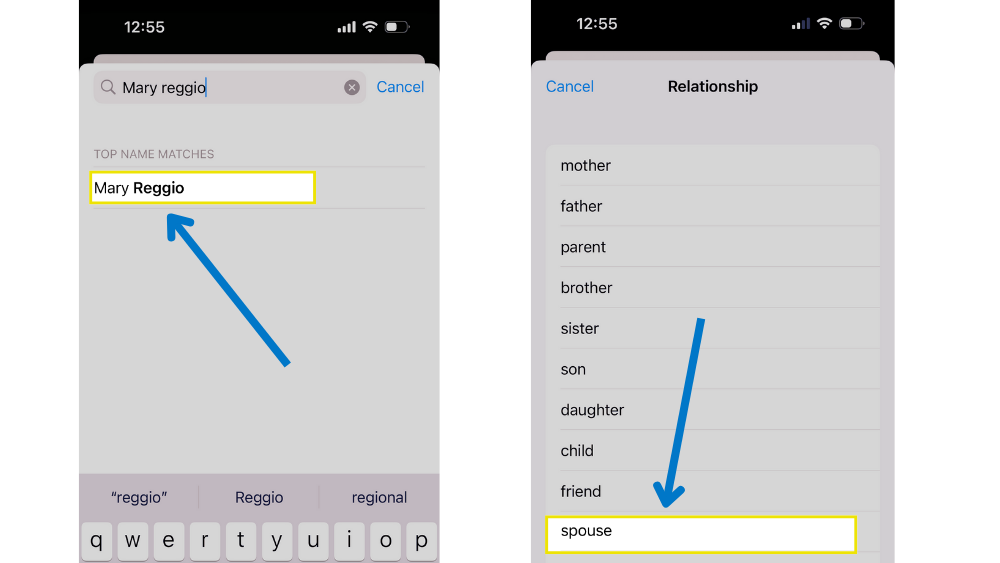
Scroll to the 'Emergency Contacts' section in the Medical ID edit mode. Tap the green Plus icon next to 'Add Emergency Contact'.
After selecting a contact, you will be prompted to specify their relationship to you (e.g., spouse, parent, friend).
6. Add any other emergency contacts and finalize settings
After selecting a relationship, your contact will be added to your Emergency Contact list. Repeat for as many emergency contacts as you’d like.
Once you have entered all the necessary information, tap Done to save your changes.
Set your emergency contact for an Android
1. Access Settings and find Safety & Emergency:
Open the Settings app on your Android phone.
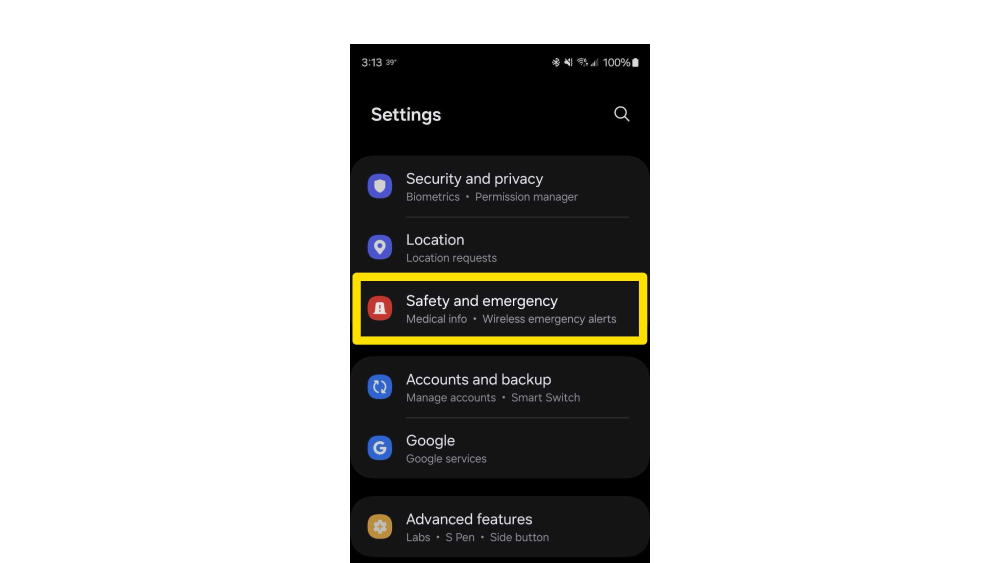
Scroll down to find the 'Safety & Emergency' option. This can sometimes be found in the Advanced Settings menu in older Android versions.
2. Find Emergency contacts:
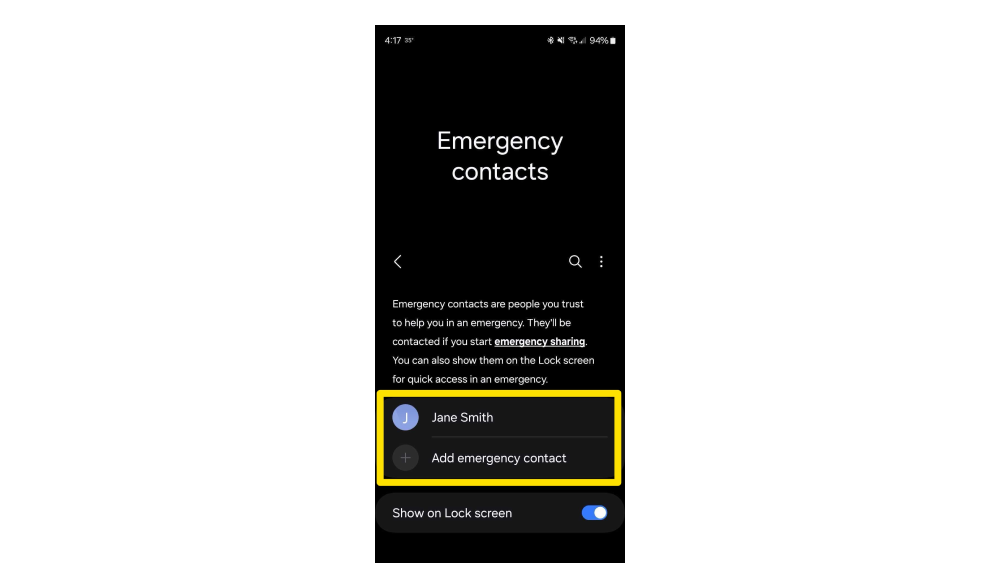
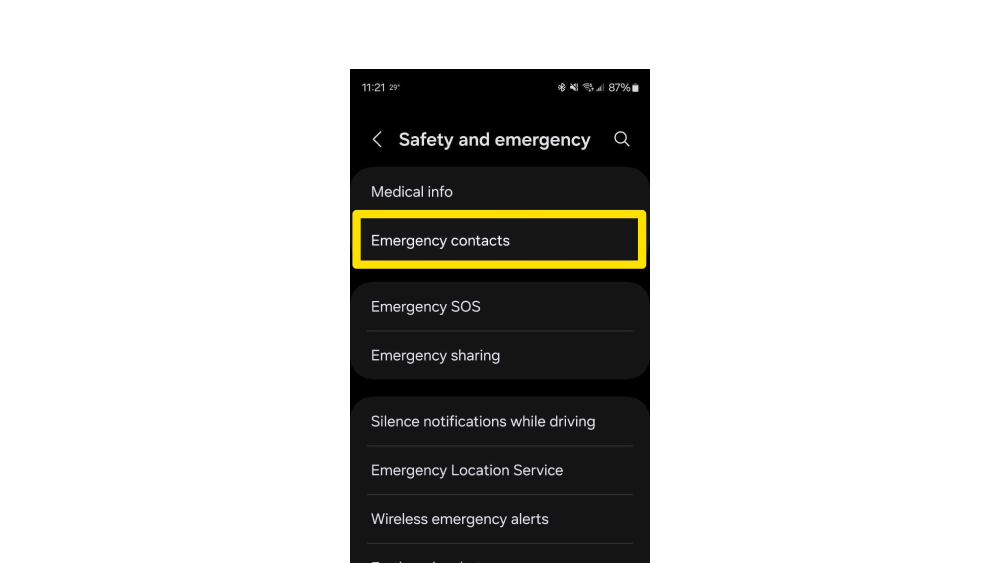
In the Safety and emergency menu, tap on 'Emergency contacts'.
3. Add your emergency contact
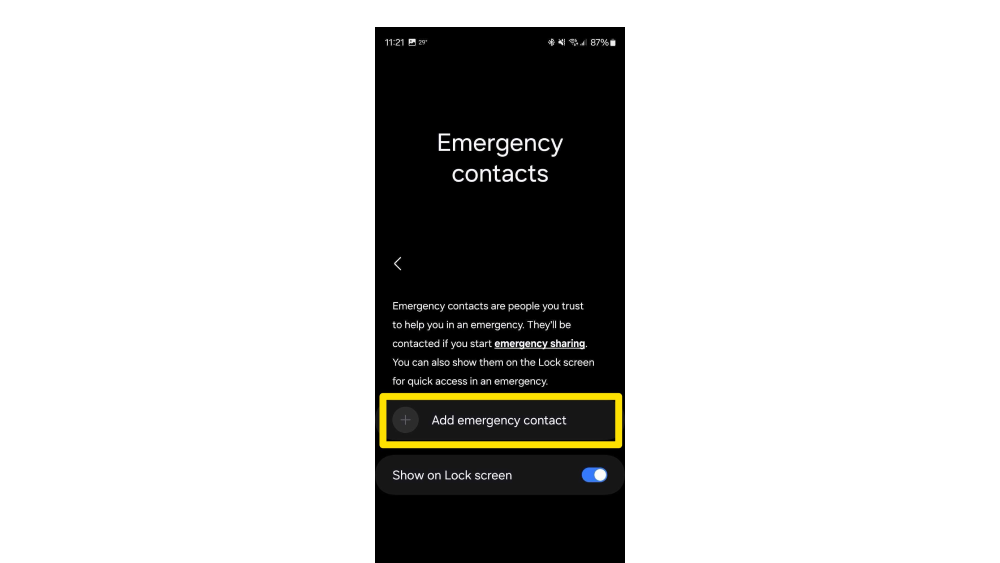
Tap “Add emergency contact” on the Emergency Contacts screen
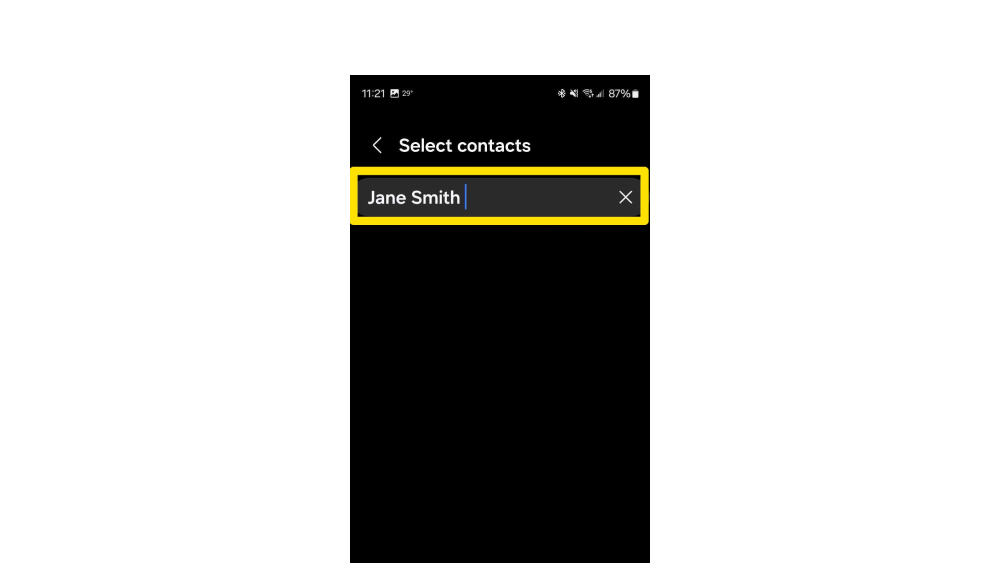
4. Select your Contact
Your phone’s contacts list will be displayed. From here, choose the person you wish to designate as your emergency contact.
If the person you want to add is not in your contacts, you'll need to first add them via the Contacts app.
You may be asked to specify their relationship to you. This helps clarify the contact’s role in case of an emergency (e.g., parent, spouse, friend).
5. Review and Save
Once you’ve added and labeled your emergency contacts, take a moment to review the information for accuracy.
Confirm the addition of the contacts by following any prompts or by simply navigating back to the main menu of the Safety & Emergency settings, which typically saves your changes automatically.
